Add Data Assigned to Me
Add Data Assigned to Me
This guide provides step-by-step instructions on how to add data assigned to you on the North Star Carbon platform.
Alert: Alert! Data field visibility is based on User Rights.
If you cannot see a field described below or do not have access to editing, contact your company's administrator to review your User Rights.
1. Navigate to https://app.northstarcarbon.com/dashboard
2. Click "Emissions Data Assigned to Me"

3. Navigate to the data line assigned to you.

4. Click the "Edit" icon to start entering data.

5. "Emission description" field is intended for internal naming of this specific data line.

6. Click the "Estimated value" field if the amout to be entered is not based on actual usage data.

7. Select the "Unit of Measure" and enter the "Usage" amount

8. Click "+ Note" to open the notes field.

Alert: Alert! All notes show up on the Audit report.
Tip: Tip! Many users add notes about where the data came from to help with the collection in future years.
9. Click "Document" to access the Document Upload function.
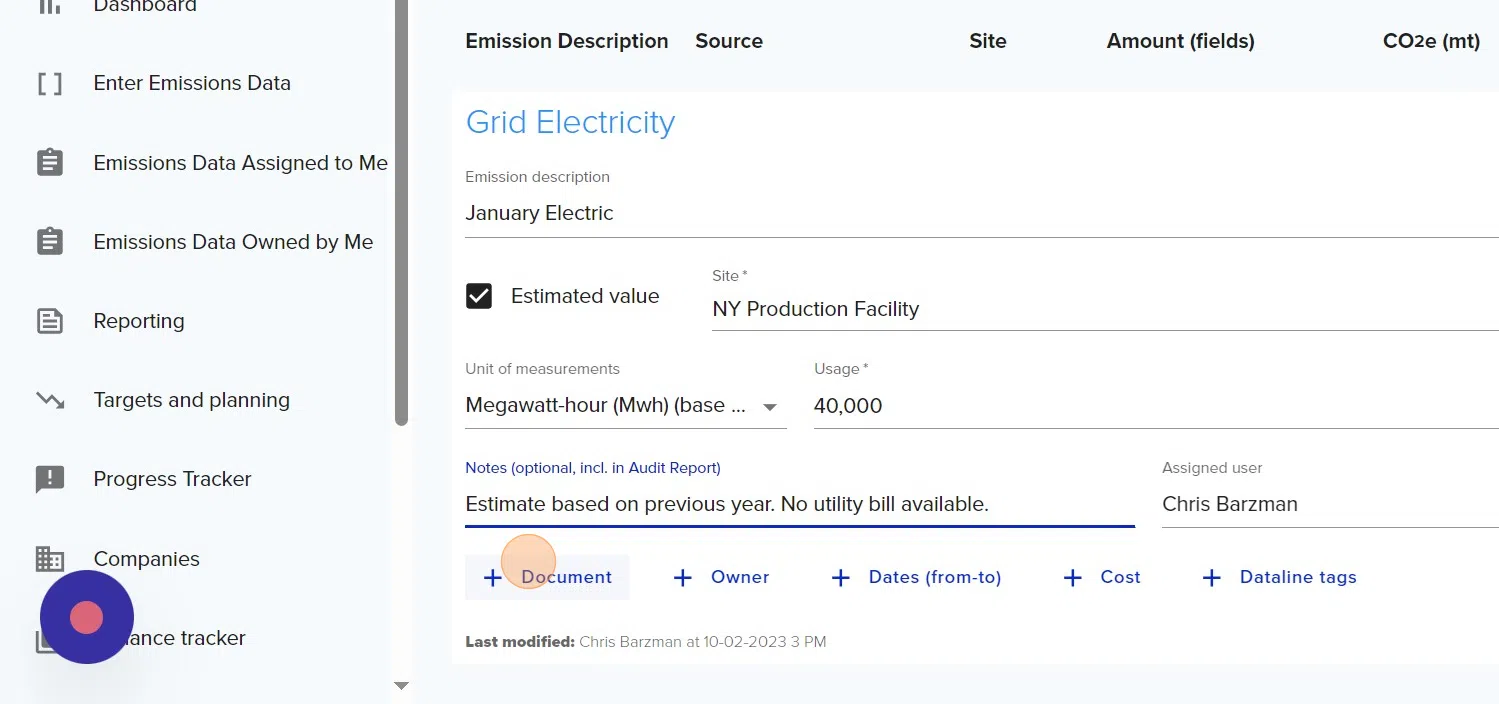
Tip: Tip! It is highly recommended to always attach a document to each data line to ensure the auditability of the final inventory.
10. Click "Dates (from-to)" to enter the reporting period for the usage entered.

11. Click "+ Cost" to enter associated costs related to the entered usage.

Tip: Tip! Adding costs to data lines allows your organization to estimate cost savings from reduction strategies.
12. Click "+ Owner" to update the person responsible for final review of this data.
Click the "Owner" field.

13. Click "+ Dataline Tags" to access your organization's unique tags.
You can also create new tags by simply entering text and hitting Enter.

14. Click "Save" to close the data line and save all entered information.

Alert: Alert! Clicking Save overrides all existing information permanently.
Verify the year, location and data line information before saving.
Related Articles
Distance Calculator Tool
Distance Calculator Tool This guide provides step-by-step instructions on how to use a distance calculator tool. By following these instructions, users can easily calculate the distance between airports and set the distance as usage for their data. ...How to add a Note to multiple data lines
How to add a Note to multiple data lines This guide provides a step-by-step process for adding a note to multiple data lines in the North Star Carbon app. By following these simple instructions, users can efficiently add a note to multiple data ...How to add a Note to multiple data lines
How to add a Note to multiple data lines Made by Chris Barzman with Scribe This guide provides a step-by-step process for adding a note to multiple data lines in the North Star Carbon app. By following these simple instructions, users can efficiently ...Change the Assignee or Owner to multiple data lines in bulk.
Change the Assignee or Owner to multiple data lines in bulk. Made by Chris Barzman with Scribe This guide provides step-by-step instructions on how to change the assignee or owner for multiple data lines in bulk on the North Star Carbon app. By ...Open a New Reporting Year and Transfer data from a Previous Year
Open a New Reporting Year and Transfer data from a Previous Year This guide provides a straightforward process for opening a new reporting year in the North Star Carbon application, ensuring users can efficiently set up the new year's reporting with ...